Posts Tagged ‘Bread recipe’
Whole Wheat Bread
Many years ago,when I first began working in restaurants, I had the good fortune of working in a 4 –star restaurant here in Detroit. Although I was working as a line chef at the time I volunteered to help in the bakeshop. This was something that I didn’t get paid for and it meant coming in 3 hours early (5 AM aargh!) but I got some good experience and I learned a lot. As my career progressed I found myself working more in the main kitchen and less in the bake shop.
Bread baking is something I don’t do often enough more. When I do I find I get a great sense of peace and relaxation. There is just something so satisfying about coaxing life from flour and yeast. For my whole wheat bread I borrowed some of the techniques I learned working in the bakeshop. Since I did not have any malt powder I replaced the water in the recipe with beer. This would give the bread a malty and sweet taste. In the flour I replaced 25% of the bread flour with organic whole wheat flour. This was still a little more whole wheat than I wanted (too much makes the bread heavy) but the bread turned out fine. I used an overnight rise to get the most flavor out of my dough.
Whole Wheat Bread
2 1/2 cups Bread Flour
1/2 cup Whole Wheat Flour
1 cup beer (dark beer is even better)
1 pkg. dry yeast
1 tablespoon Brown Sugar
1/2 tsp salt
1/4 cup olive oil
Sift both flours together with the salt
Heat beer and sugar in the microwave or on the stove until it is warm. Don’t overheat this because the yeast will die if the liquid is too warm.
Stir in yeast and let it activate (sit) for about 10 minutes.
Start adding the flour a little at a time until a dough is formed. If you have a stand mixer with a dough attachment use this to mix your dough until it pulls from the side of the bowl.
Remove from the mixer and form a ball with the seam on the bottom. Place in a oiled bowl,cover and set in a warm place to rise.
When dough has doubled in size remove it from the bowl and punch it down. You will hear and feel some of the pockets formed by the yeast growing. By punching the dough down you expose the yeast to more food sources. Form a ball again and return the dough to the bowl. Place the bowl in the refrigerator. and let it sit overnight. Even though it will look like nothing has happened the yeast is still feeding and your dough is developing flavor.
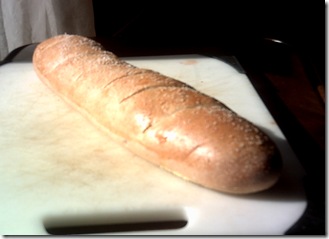
Remove the dough form the bowl and shape your dough. This is the creative part of the process. If you wanted you could use a greased loaf pan and bake a loaf of bread or leave it round. I made 2 smaller baguettes with my dough and placed the on a cutting board that I had sprinkled cornmeal on. This way I could transfer my dough to the baking stone I keep in my oven.
Whichever way you choose (and I know it depends on the equipment you have in your house) The dough needs a final rise. Once again you want to let your dough double in size. Before baking I use and egg white and water glaze so I get a nicely browned and professional looking loaf. I also sprinkle some kosher salt on top for extra flavor (you could also use sesame seed).
Now it finally time to bake your bread. 20-25 minutes in a preheated 350 degree oven is just about right. remove when bread is golden brown and you get a hollow sound when you knock on your loaf.
Some things to consider:
How you approach your bread baking depends heavily on you equipment and environment. I do not have a stand mixer with a dough attachment so I used a hand mixer I have with some small dough hooks. I then finished kneading my dough by hand.
Remember,your bread dough is a living thing and how it grows depend on the conditions it is in. My kitchen may be warmer/cooler than yours. Humidity is another factor. Higher humidity and you bread will rise better. Learn to understand the conditions in your kitchen!
A master bread baker once suggested that you start baking your bread in a cold oven. While this would work while you are baking in a Loaf pan or on a greased sheet pan My bread goes directly on a stone and would stick if I did it this way. Also I use my oven to warm the room and help my bread rise.
A Pizza stone is a fun thing to have. If you are using one be careful of temperature change. Never put a cold stone in a hot oven. It may crack. Also don’t take your stone out of the oven warm and try to clean it for the same reason. These are reasons why my Pizza stone stays in my oven all the time.
For lots of bread recipes and techniques read The Bread Baker’s Apprentice by Peter Reinhart or Join The Bread Baker’s Apprentice Challenge


